After recovering as much detail as possible in LR, PS will be required to complete the process for any blown highlights. The objective is to pull grab on to even the slightest bit of contrast within the blown highlight and increase it – which by definition is to make the greys darker.
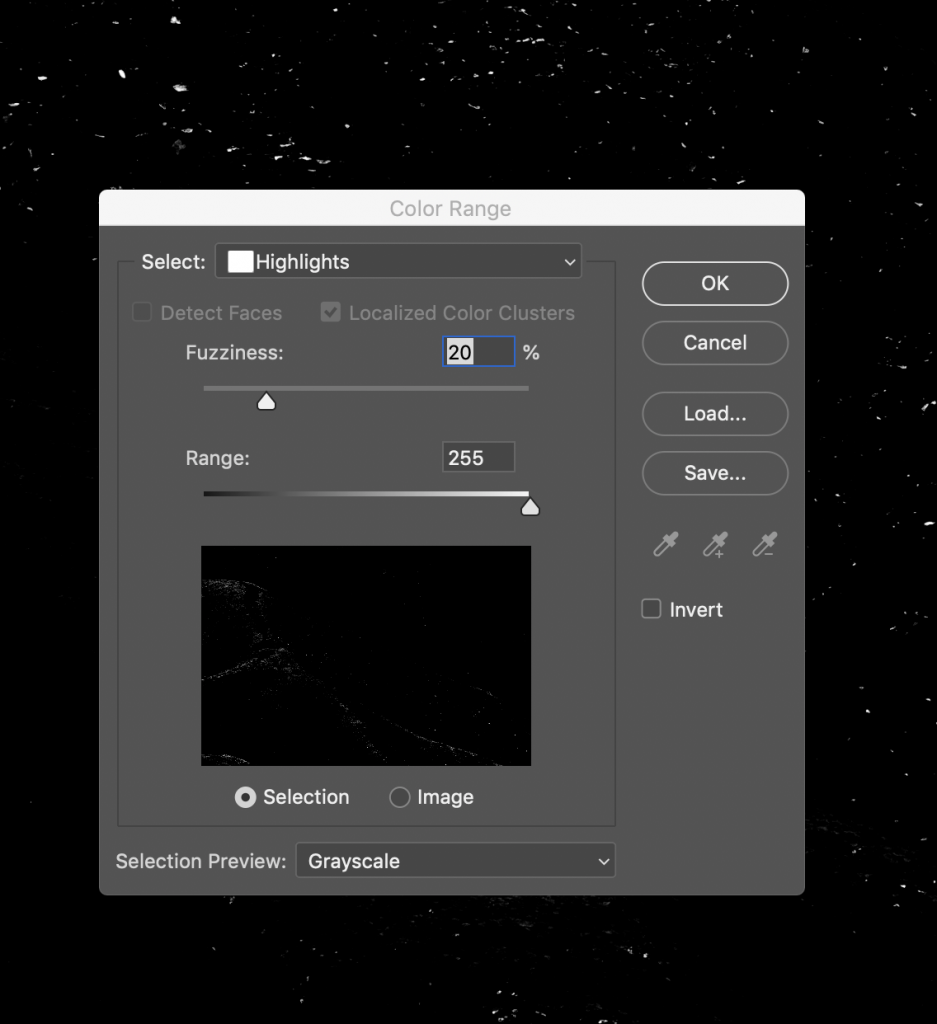
First create a detailed Luminosity Mask selecting only the blown highlights. This is best accomplished by using Select > Color Range > Highlights then setting the fuzziness to select just the desired highlights. Turning on Grayscale may assist in the selection. Range should be set to 255 or as required for the specific image.
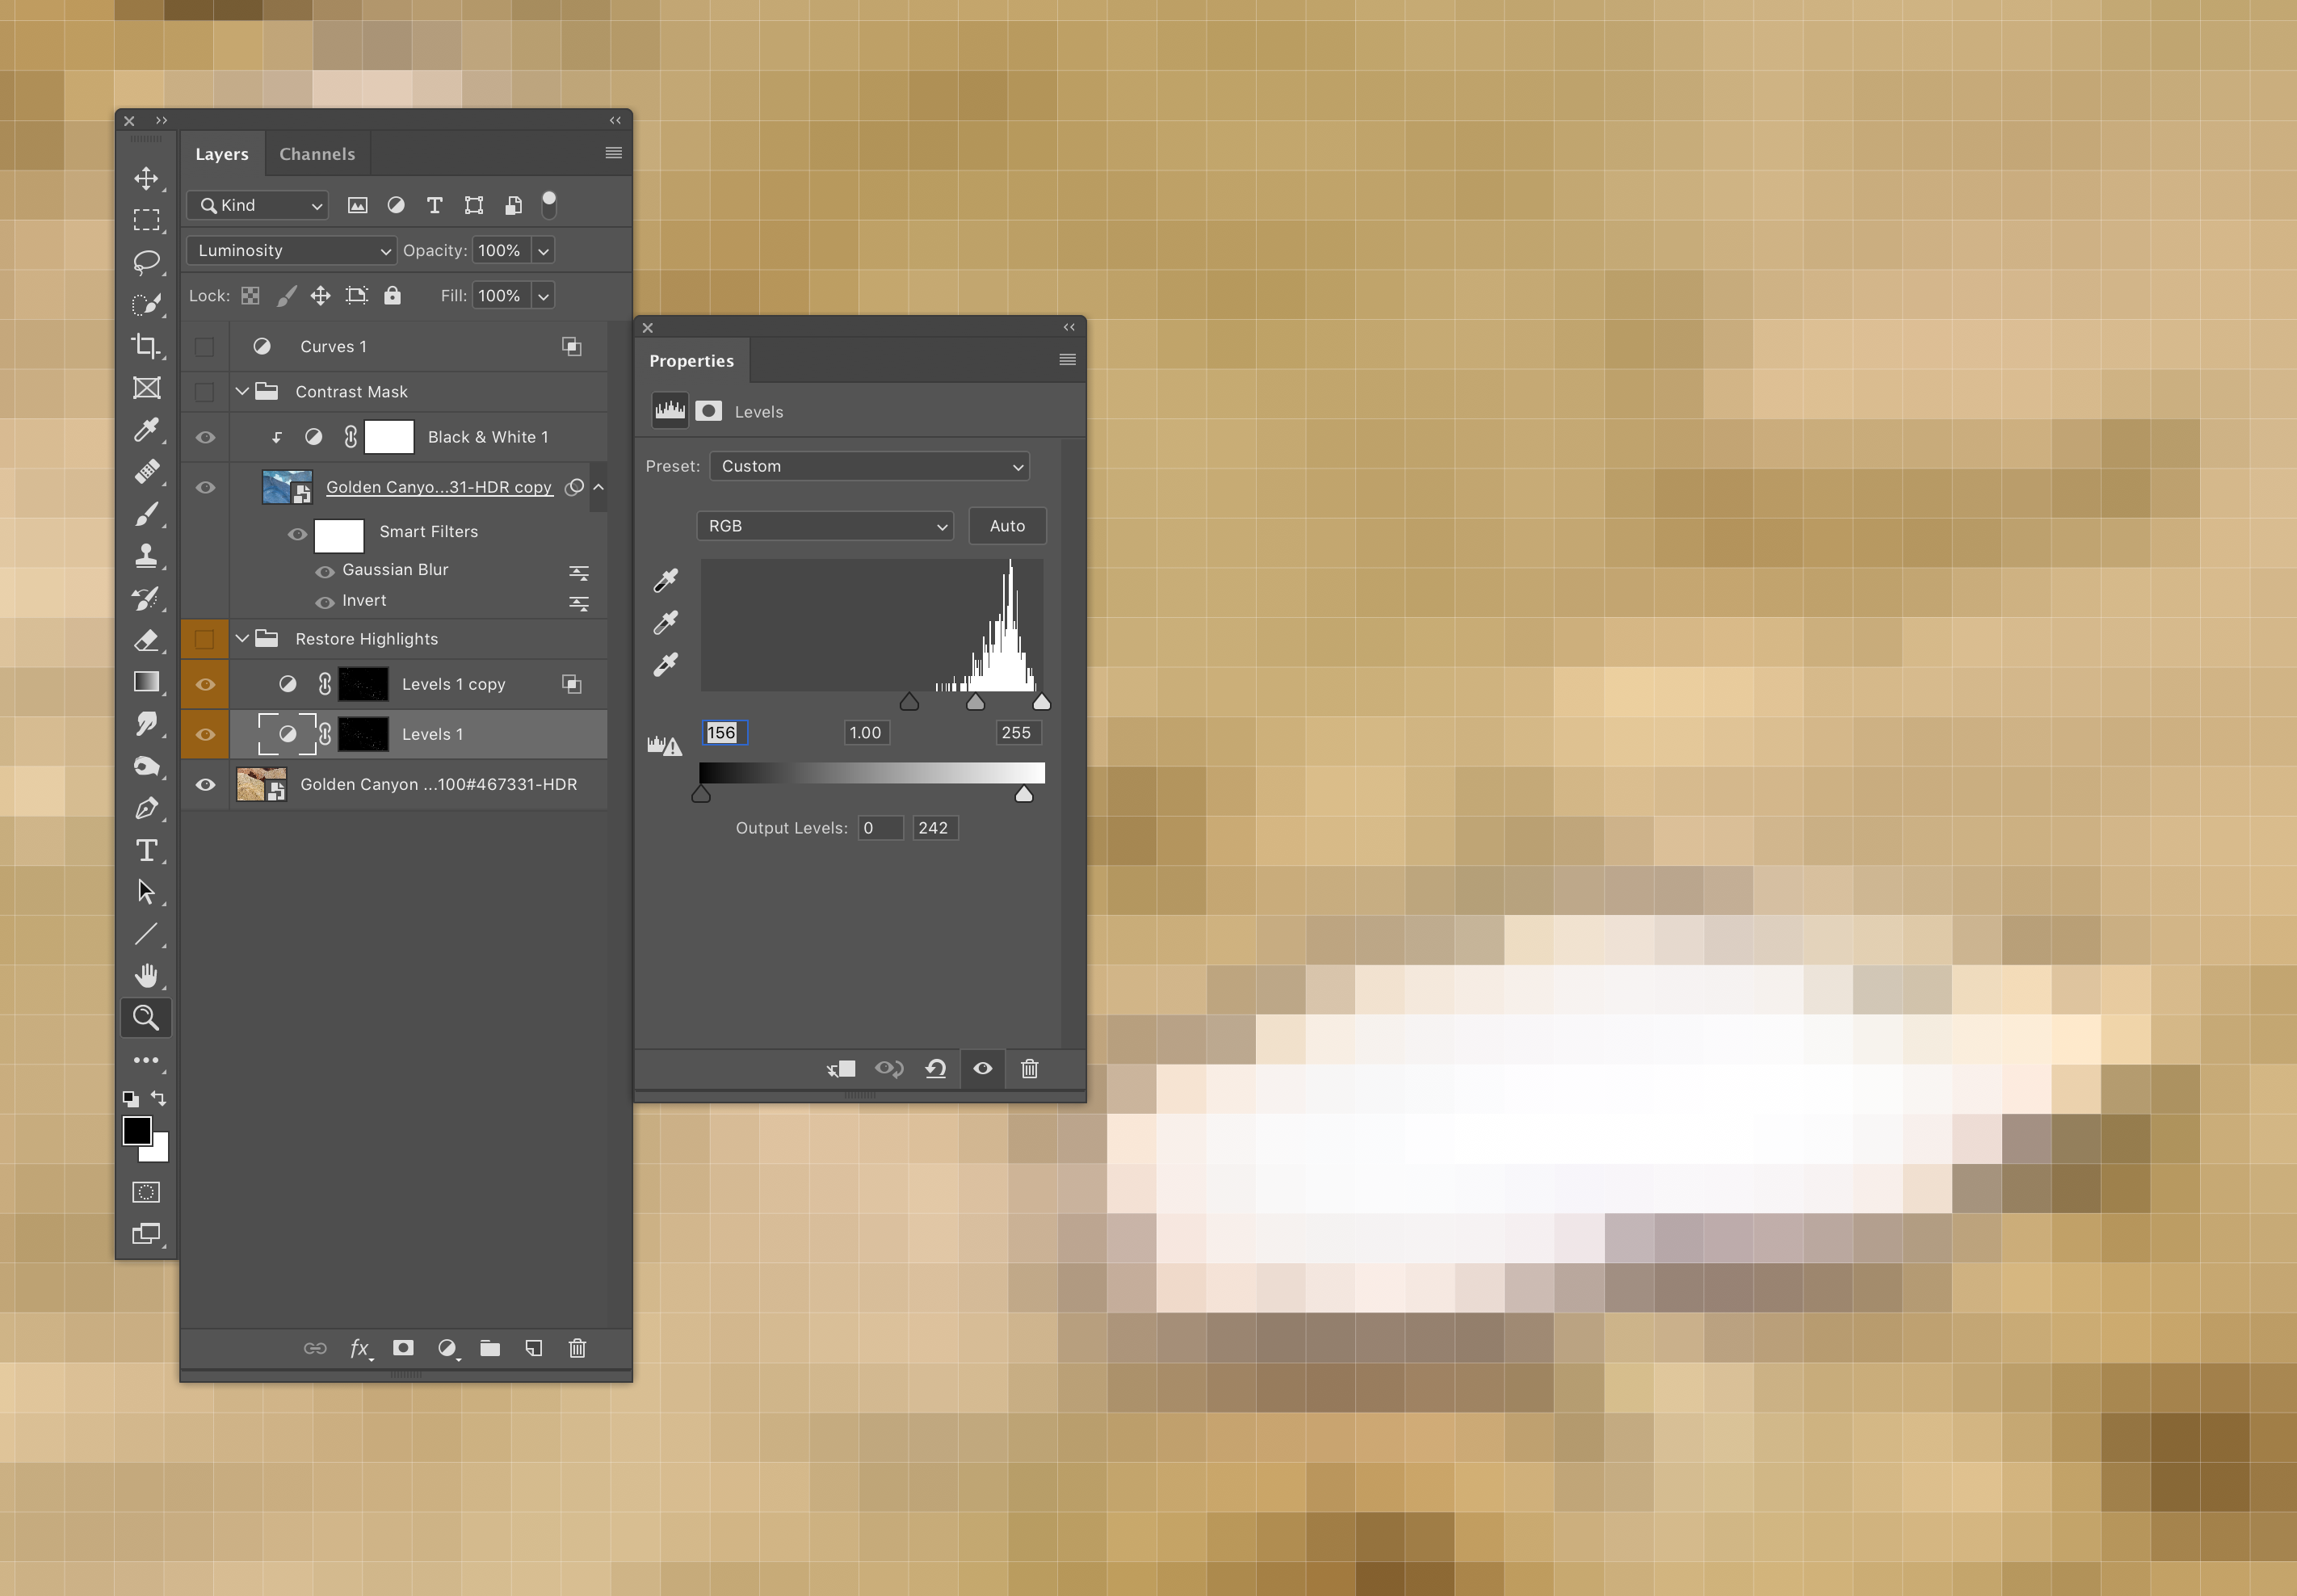
Create a Mask from the selection on a Levels Layer with a blend mode of Luminosity (to avoid changes to the colour).
Zoom way in to a blown highlight (2000-6000 %). It it the big blob in the example below to the right . Notice that is it not actually totally white – it has some detail which is not visible at 100%. Use a Levels adjustment to compress the dynamic range of the highlights – in this sample 156,1,255 with whites limited to 242. White output varies but would at least be something less than 250 – what ever is required to visualize the contrast in the whites.
Duplicating the Levels adjustment allows more refinement (also with Luminosity Blend Mode). Use blend-if (double click the empty space on the levels layer) and move the black point to increase the contrast. Feather the whites as necessary trying to pull the detail out of the white blob.
The final result is below. I placed the two level adjustments into a group which would allow the opacity to be changed (3 orange layers).
